These instructions describe the various upload options. You can copy data via the browser, via FTP access, via a URL or from other users.
1. Upload via Browser
Step 1: Open the upload page
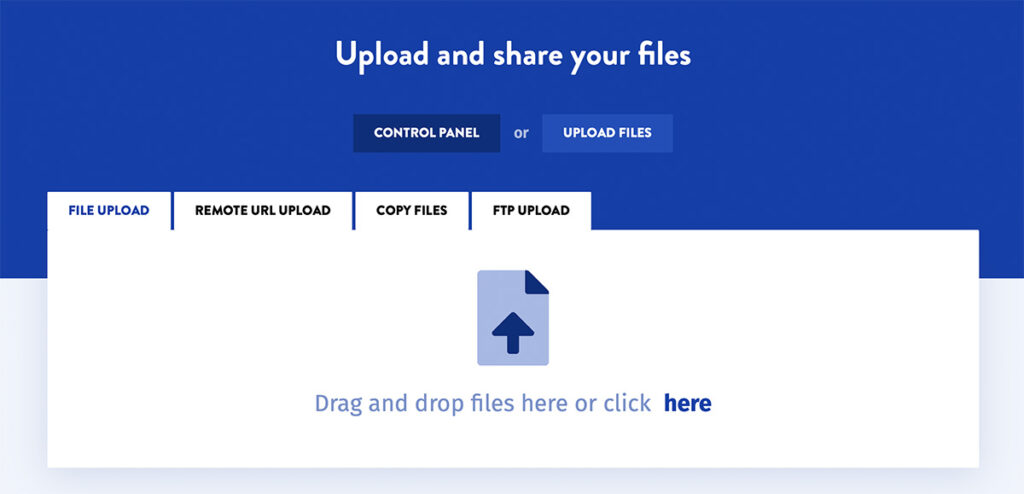
First you have to visit the DDownload website. To do this, open your web browser and enter the URL “https://ddownload.com/” in the address bar. Once the page has loaded, click on the “Upload” button located in the top menu bar.
Step 2: Select your files
After you have clicked on the “Upload” button, a new window will open. Here you can select your files by either clicking on “Select files” or by dragging and dropping your files into the window. Note that you can upload files up to 2 GB in size.
Step 3: Choose the location of your files
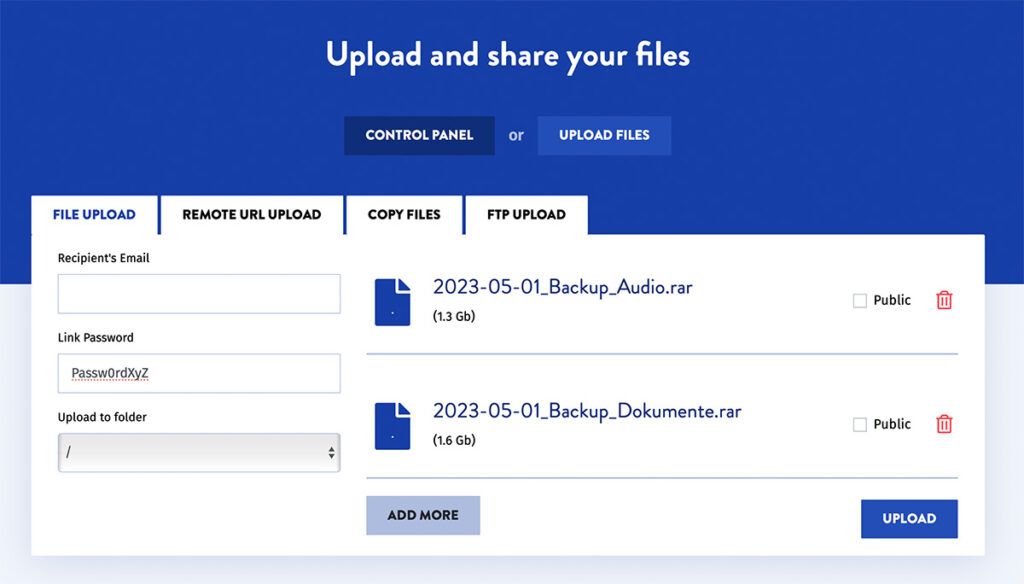
Once you have selected your files, you can now choose the location where they should be saved. You can also set a password link and enter the recipient’s email. The recipient will be notified by email after the upload is complete. You can also choose whether the data should be publicly visible via your user profile or not.
Step 4: Start the upload process
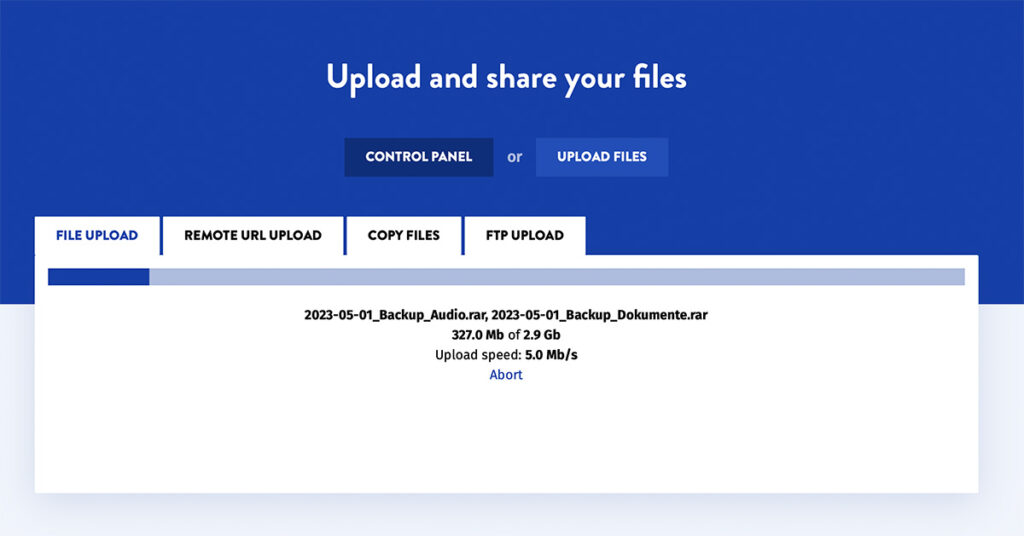
Once you have selected your storage location, you can click on the “Upload” button to start the upload process. Depending on the size of your files, the upload process may take some time.
Step 5: Copy the download link
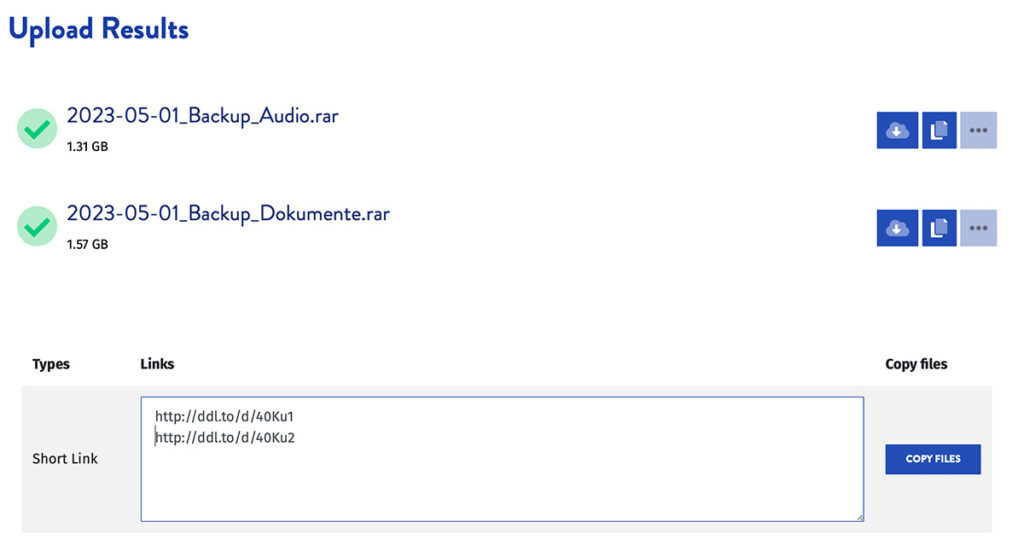
Once the upload process is complete, you will see a download link for your uploaded files. Copy this link and share it with others so that they can access your files.
Uploading files to DDownload is therefore relatively simple and straightforward. With these five steps you can easily store your files online and share them with others.
2. Remote URL Upload
Remote URL upload is a feature of DDownload that allows users to download files from other websites and upload them directly to their own DDownload account. This feature saves time and effort in manually downloading and uploading files.
To use the remote URL upload, you must first go to the website from which you want to download the file and copy the URL (web address) of the file. Then go to your DDownload account and click on the “Remote URL Upload” button.
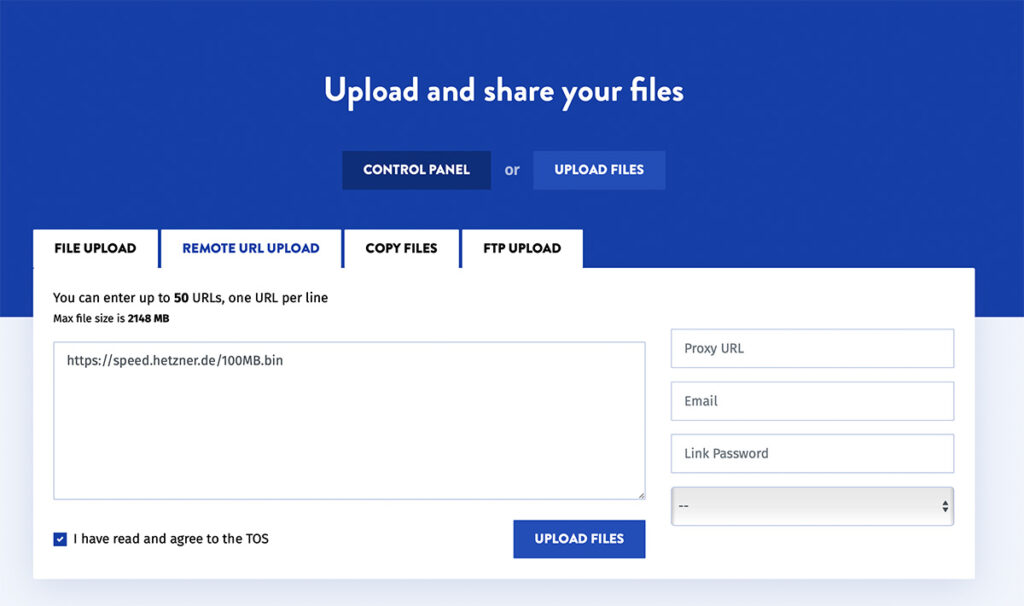
In the window that appears, you can insert the URL and click on “Next”. DDownload will now attempt to import the file from the specified URL.
If the file has been imported successfully, it will be displayed in your DDownload account and can be downloaded or shared from there like any other file. Please note that the remote URL upload may not always be successful due to dependence on the availability and stability of the source website.
Some important things to keep in mind when using remote URL upload:
- It may not be possible to import files from some websites as they restrict access to their files.
- It is important to make sure that the file you want to upload does not infringe copyright or violate other laws.
- Make sure that the source website is stable and that the file remains accessible, as the remote URL upload does not guarantee that the file will be imported successfully.
- There may be restrictions on file size or the number of files you can import at one time. These restrictions vary depending on the tariff plan.
FTP Upload
Step 1: Download FTP client software
In order to upload to DDownload.com via FTP, you will need FTP client software. There are many different FTP clients to choose from, including free and paid options. Some recommended options are FileZilla, WinSCP and Cyberduck. After downloading and installing the FTP client, you need to open it.
Step 2: Connect to DDownload.com
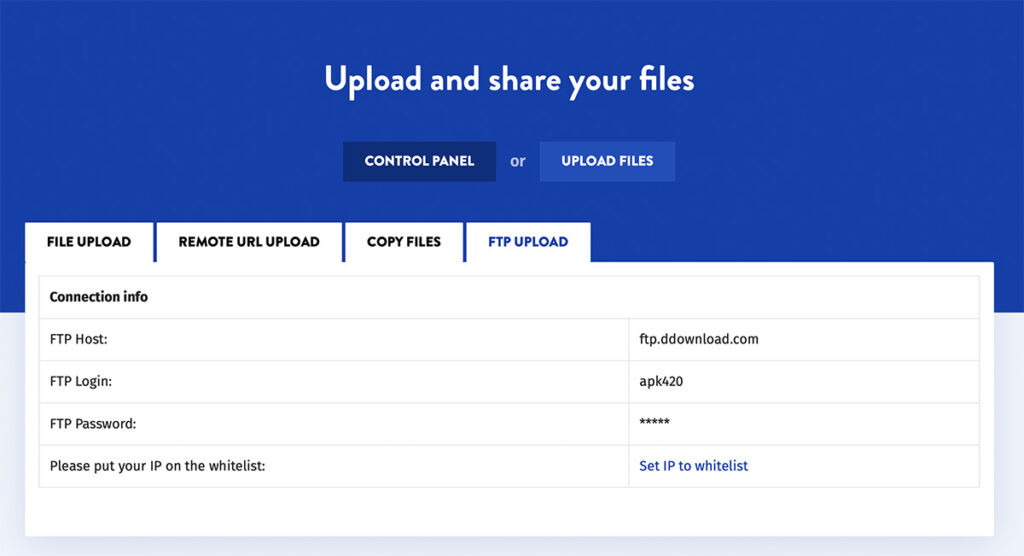
To connect to DDownload, you need the FTP access data. Under “Upload” -> “FTP Upload” you will find the necessary information, such as the FTP host name, the user name and the password. These data must be entered in the FTP client to establish a connection to DDownload.com.
Step 3: Upload files
Once you have successfully connected to DDownload.com, you can simply drag and drop files from your computer into the FTP client and upload them to DDownload.com.
Note: Set IP to whitelist
Note that you must whitelist your own IP address in the settings before you can upload via FTP. This can be done under “Settings” -> “Configuration” -> “Whitelisted IP for FTP upload”. Here you have to enter your IP address or click on “Get current Session’s IP” to add it to the whitelist. Otherwise you will receive an error message when trying to upload data.

